The Complete Home Dance Studio Setup Guide (2026)
A home dance space is one of the most enjoyable upgrades a dancer can make — but let’s be realistic: most people aren’t building a full professional studio. It’s usually a spare bedroom, a corner of a basement, or even a bit of open space on carpet. And that’s perfectly fine. You don’t need perfection — you just need something that works and that you’ll actually use.
Step 1: Choose Your Space
You don’t need a huge room. For basic barre work and stretching, even a small area can work — about 6 × 8 feet is enough to get started. If you have more room (10 × 12 or larger), that’s great, but not required.
Common setups include a spare bedroom, a section of a basement, or even a hallway wall. The key is having enough space to move comfortably and a clear wall for your barre.
Step 2: Flooring — Keep It Practical
In a perfect world, you’d have sprung flooring — but most home setups don’t, and that’s okay. The reality is that most people aren’t doing hours of jumping or full classes at home.
What works in real homes:
- Carpet (very common and perfectly fine for light barre work and stretching)
- Hardwood with a yoga mat or small dance mat for comfort
- Foam tiles if you want a bit more cushion
If you plan on doing a lot of jumping or intense training, then upgrading flooring becomes more important — but for most home users, simple and comfortable is enough.
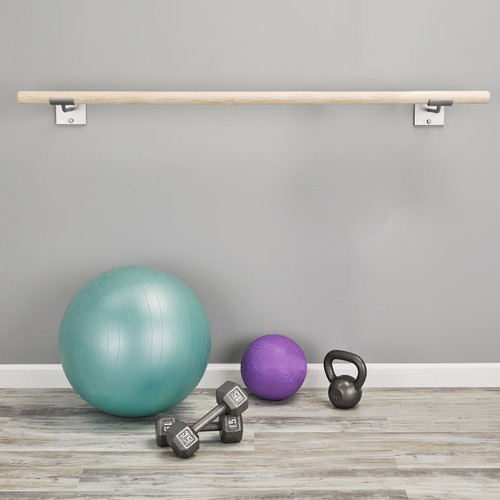
Step 3: Your Barre (This Is the Upgrade That Matters Most)
If there’s one thing worth doing right, it’s the barre. A wall-mounted barre instantly makes the space feel real and gives you proper stability — even in a casual setup.
Simple, practical recommendations:
- Length: as long as your wall allows (even 4–8 feet makes a big difference)
- Height: around 36–42 inches depending on your height
- Diameter: 1-5/8" for a classic feel, 2" for a more relaxed fitness grip
- Wood: maple or ash for a smooth, comfortable surface
This is where Custom Barres stands out — even in a simple home setup, the difference in solid hardwood and precision-built brackets is immediately noticeable. It feels stable, smooth, and intentional — not temporary or makeshift.
Step 4: Mirrors (Optional but Helpful)
Mirrors are great, but not essential. Even a single full-length mirror can help with alignment and self-correction. Many people start with a basic mirror and upgrade later.
Step 5: Lighting
Natural light is ideal if you have it. Otherwise, simple warm or neutral lighting works well — nothing fancy needed. The goal is just to see your movement clearly without harsh glare.
Step 6: Sound
A basic Bluetooth speaker is more than enough. You don’t need a full sound system — just something easy to use that fills the room.
Realistic Budget
- Barre: $300–$1,500 depending on size and finish
- Mirror: $100–$400
- Flooring (optional): $0–$1,500
- Everything else: minimal
Most home setups don’t need to be expensive. You can create a space you actually enjoy using without overbuilding it.
Start simple. A well-made barre, especially one built by Custom Barres,is what transforms a normal room into a space you’ll actually want to practice in. Everything else can come later.